I've mentioned my fondness for Pushbullet in the past. You can easily send links to websites from one device to another, as well as receive notifications from your phone on your desktop. You can even send SMS messages from your desktop.
One of the features I've been using more and more lately is the ability to copy and paste text from one device to another. For example, suppose I'm working on something on my tablet and need to insert a block of text that is on my computer. With Pushbullet's universal copy and paste, I can highlight and copy the text on my desktop. Then, after waiting a second or two, on my tablet, I simply choose paste where I want the text I copied on my desktop to go.
To enable this, on all of your devices you want to be able to do this, simply open up Pushbullet's options and enable Universal Copy and Paste.

A blawg devoted to providing practical tech tips to lawyers
Friday, December 19, 2014
Wednesday, December 17, 2014
Tasker for Attorneys: Have Your Android Wear Watch Find Your Misplaced Phone
When I have my Galaxy Gear Live connected to my phone, it automatically turns the volume and vibration off on the phone. Of course, if I then misplace my phone under a pile of papers in the office, I can't find my phone. With the volume down, I can't just call it. How can I find it quickly and easily?
Fortunately, Tasker can come to the rescue.
First, get Tasker. Yes, it is a paid app. But it is worth the price of admission for the control and automation it can bring. To increase the usability with your Android Wear Watch, get WearTasker as well.
In Tasker, the first order of business is to create a variable. On the Tasker home page, go to the VARS tab. Add a new variable and call it %FOUNDPHONE.
Next, in Tasker, go to the TASKS tab and create another new task. Give it a name you find useful.
In your new task, add an action. Choose the Variables action category. Then choose Variable Set. The name of the variable to set is %FOUNDPHONE. Set it to 1.
The next action to add is to increase your phone's volume. Select the Audio action category, and choose ringer volume. Set the volume to 7 or higher so that it will ring loudly.
Fortunately, Tasker can come to the rescue.
First, get Tasker. Yes, it is a paid app. But it is worth the price of admission for the control and automation it can bring. To increase the usability with your Android Wear Watch, get WearTasker as well.
In Tasker, the first order of business is to create a variable. On the Tasker home page, go to the VARS tab. Add a new variable and call it %FOUNDPHONE.
Next, create a new task and call it “Kill Ringer”. The only
action that we’ll add to this task is to set a variable. So, add a new action, choose
the “Variables” action category, and choose variable set. The name will be
%PHONEFOUND. Set it to 2. Save this task.
Next, in Tasker, go to the TASKS tab and create another new task. Give it a name you find useful.
In your new task, add an action. Choose the Variables action category. Then choose Variable Set. The name of the variable to set is %FOUNDPHONE. Set it to 1.
The next action to add is to increase your phone's volume. Select the Audio action category, and choose ringer volume. Set the volume to 7 or higher so that it will ring loudly.
Now, add another action. Choose the “Media” action category.
In there, choose “Play Ringtone”. The type should be “ringer” and stream should
be “Alarm”. Under if, the first box should be %FOUNDPHONE, the sign should be
equals, and the third box should be 1. This step is important. If you don’t set
the ringtone to only play when the variable = 1, then it might ring in an
unceasing loop. That would be annoying, to say the least.
The next action we’ll add is a pop up. This way, when you
find your phone, you’ll be able to easily quiet the ringer. Add a new action,
choose the “Alert” action category, and then choose “Popup Task Buttons”. Under
the Text, put in something like “Found my phone”. For mode, choose text. For
task, you’ll put in Kill Ringer. Lastly, set the Timeout (Seconds) slider to
60.
What this does is create a popup on your phone with a button
that says “Kill Ringer”. When you push the button, it runs the first task we
created, which sets the %PHONEFOUND variable to 2, which stops the ringer.
Also, the popup will disappear after 60 seconds.
The last task we want to add is to again set the %PHONEFOUND
variable. This time, set it to 2. This way, if the previous popup disappears
due to the timeout, your phone will stop ringing.
Now, leave Tasker and go to WearTasker. Click the floating
action button at the bottom and choose “Add task”. The task to add will be the
one we just finished creating in Tasker. Save and exit.
WearTasker will update your watch with this task. When you
open WearTasker on your watch, it will have a button with the name of your
task. Pressing it will run the task, increasing your phone’s volume and causing
it to ring.
Now, when you misplace your phone in your office with the volume
low, you’ll be able to quickly and easily find it.
Monday, December 8, 2014
How to Add Bates Stamps using Acrobat Pro
Whether dealing with vast quantities or even a few dozen discovery documents, organization is critical. Bates Stamping documents makes staying organized much easier. However, if you have Acrobat Pro and are still using an actual Bates stamp or machine, you're making life much too difficult.
For those unfamiliar with Bates stamping, it is a system of putting a prefix and incremental number on the bottom right corner of every page. For example, if I received 100 documents from Plaintiff Smith, I might put SMITH 00001 on the first page, SMITH 00002 on the next, and so forth. Physically stamping this way used to be the practice, and I'm sure some still do that.
But, let me show you how I do it.
First, if you haven't already done so, scan all of your documents into a .pdf file. Save the file. I typically will give it a useful name and then add the word "clean" to the end. This tells me that this is my original, unnumbered set of documents. I then make a copy of the file and add the word "bates" to the end. This is the document I'll number. It is also the document I'll be using from here on.
Open that file in Acrobat Pro. From there, on the right side drawer, go to "Tools" -> "Pages" -> "Bates Numbering". Choose to add bates numbers.
This will pop up a new window. Choose to Add documents and select add open files:

Choose the open file you want, then select Ok. Hit Ok again and you will see a new window open up:

Put the cursor in the "Right Footer Text Box" and then click the "Insert Bates Number" button. In the new window, put in the prefix you want to use remembering to put a single space at the end. You can adjust the starting number and number of leading zeroes if you like. Select Ok and then Ok again.You now have a Bates numbered document, which will help with organization.
For those unfamiliar with Bates stamping, it is a system of putting a prefix and incremental number on the bottom right corner of every page. For example, if I received 100 documents from Plaintiff Smith, I might put SMITH 00001 on the first page, SMITH 00002 on the next, and so forth. Physically stamping this way used to be the practice, and I'm sure some still do that.
But, let me show you how I do it.
First, if you haven't already done so, scan all of your documents into a .pdf file. Save the file. I typically will give it a useful name and then add the word "clean" to the end. This tells me that this is my original, unnumbered set of documents. I then make a copy of the file and add the word "bates" to the end. This is the document I'll number. It is also the document I'll be using from here on.
Open that file in Acrobat Pro. From there, on the right side drawer, go to "Tools" -> "Pages" -> "Bates Numbering". Choose to add bates numbers.
This will pop up a new window. Choose to Add documents and select add open files:
Choose the open file you want, then select Ok. Hit Ok again and you will see a new window open up:
Put the cursor in the "Right Footer Text Box" and then click the "Insert Bates Number" button. In the new window, put in the prefix you want to use remembering to put a single space at the end. You can adjust the starting number and number of leading zeroes if you like. Select Ok and then Ok again.You now have a Bates numbered document, which will help with organization.
Monday, December 1, 2014
Use Tab Stops to Line Up Words in Microsoft Word
I've talked in the past about the importance of using the left indent instead of the space bar when adjusting where to start text on the page. This addresses how to align the left margin of blocks of text. But, what about aligning items in the middle of a sentence?
For example, let's look at the top of an affidavit in common use in Ohio:
 The goal here is to align the closing parentheses vertically. I've received a number of documents from colleagues where they are almost aligned, but not quite:

The reason for the misalignment is simple. The drafter used the space bar to try to line everything up:

There are a number of problems with this method. First, it will rarely result in having everything lined up vertically unless you are using a monospaced font. As Butterick says in Typography for Lawyers, "There are no good reasons to use monospaced fonts. So don't."
Second, fixing typos can be a pain. If you notice you made a mistake with the space bar method, you will likely have to go back and fix all of those spaces again, which can be a headache.
Lastly, it is time consuming. You end up spending a good deal of time trying to get the alignment close only to end up with imperfect results.
Instead of using the space bar, set tab stops. Here's how I would create the alignment.
First, type in your text and insert a single tab between the last word and the closing parentheses. So, when you're done, you'll have something that looks like this:
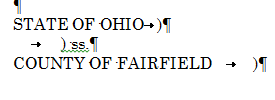
Those arrows pointing to the right indicate the press of the tab key. So, how does this help us? Now, when you adjust the tab stop, it will align those parentheses. To do this, highlight all three lines. Then, click on the top ruler to insert a tab stop where you want the parentheses to line up:
 This will add a tab stop on your ruler, which I have circled above. Now, your parentheses will all be perfectly aligned.
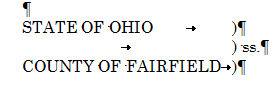
If you need to edit the location of the parentheses at any point, simply highlight all three lines and click and drag the tab stop in the ruler to the new location.
Using this method will save you time and headache and result in a better end product than using the space bar.
For example, let's look at the top of an affidavit in common use in Ohio:
The reason for the misalignment is simple. The drafter used the space bar to try to line everything up:
There are a number of problems with this method. First, it will rarely result in having everything lined up vertically unless you are using a monospaced font. As Butterick says in Typography for Lawyers, "There are no good reasons to use monospaced fonts. So don't."
Second, fixing typos can be a pain. If you notice you made a mistake with the space bar method, you will likely have to go back and fix all of those spaces again, which can be a headache.
Lastly, it is time consuming. You end up spending a good deal of time trying to get the alignment close only to end up with imperfect results.
Instead of using the space bar, set tab stops. Here's how I would create the alignment.
First, type in your text and insert a single tab between the last word and the closing parentheses. So, when you're done, you'll have something that looks like this:
Those arrows pointing to the right indicate the press of the tab key. So, how does this help us? Now, when you adjust the tab stop, it will align those parentheses. To do this, highlight all three lines. Then, click on the top ruler to insert a tab stop where you want the parentheses to line up:
If you need to edit the location of the parentheses at any point, simply highlight all three lines and click and drag the tab stop in the ruler to the new location.
Using this method will save you time and headache and result in a better end product than using the space bar.
Subscribe to:
Posts (Atom)